
I’m a simple craft kind of girl. I’ve only used a glue gun a handful of times and I can’t sew for my life (although I want to change that) but that doesn’t stop me from doing crafts. I’ve found that the more time I spending crafting (and pinning) the more inspiration I get for projects.
At the beginning of the summer I got into the habit of picking up cheap frames that I absolutely loved but needed some tender loving care. This summer I also picked up some beautiful fabric, ya know, just in case I magically learn how to sew I knew it was something I needed. I made an adorable Fabric Covered Mason Jar out of it but I also knew that fabric was destined for more.
While I was browsing Consumer Crafts it came to me. A fabric covered cork board. I had the idea in mine before but hadn’t been able to find the size cork board I was looking for in a FULL piece. I’ve seen the tile in multiple spots but never a role like Consumer Crafts had.
Here’s What you’ll need to make your very own Fabric Covered Cork board, which if I do say so myself is WAY prettier than any cork board I’ve ever come across!

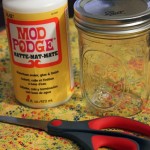
- Fabric (enough to cover the opening in your frame)
- Frame
- Scissors
- Sand Paper
- Rolled Cork board
- Spray Adhesive
- Primer (optional)
- Paint of your choice (optional)
The first thing you need to do is clean the entire frame and take off the backing. I removed the glass but kept the photo to use as the template to cut the cork board and to provide more depth. The next thing I did was sand any rough spots in my frame.

Once sanding is down clean the frame again. This is the point that you will prime the frame using spray paint and then paint it a color that corresponds with your fabric. At first I was going to paint my frame but then I opted not too. I just couldn’t find something that fit my fabric the way I wanted too and instead decided to leave it the natural color of the wood imperfections and all!
While the paint is drying (or not) use the picture from your frame to measure TWO layers of cork board. Cut to size.


Once you have cut down TWO pieces to size spray the adhesive on the picture and on one of the pieces of cork boards. Press the cork board and the picture together. Quickly spray the cork board again and the back of the other cork board and press it onto the layer of picture/cork board.
Move the board to a flat service and weigh down using heave objects to help the adhesive stick together. I used heavy books

After an hour everything should be dried. Next cut the fabric to the size of the cork board using an inch of fabric to fold over the side.

Spray a layer of adhesive onto the cork board and press the fabric down onto it making sure everything stays smooth. I did this by doing it in pieces the fabric adhered very quickly to the corkboard but for good measure when you’re done I would flip it over and put something heavy on it (think books again). After 30 minutes pull the edges tighter and spray those down.
After an hour everything should be dry and ready to go in the frame!

I absolutely LOVE the way this turned out and plan on making a couple of more for my sisters if they want them! I’m currently looking for super cute pins so if you have a place to get them let me know 🙂
For more info about Consumer Crafts (where I purchased the cork board and the adhesive glue, as well as a bunch of other cute items) visit them here:
What do you think? Prettier than a standard cork board?
More fun crafts made with products from Consumer Crafts
Disclaimer: I wrote this post as part of a paid campaign with Consumer Crafts and Blueprint Social. The opinions in this post are my own.


So cute! I would have gotten as close as putting pushpins (MAYBE staples if I was feeling adventurous) holding up a piece of fabric on an already-made bulletin board. I think you win on this one!
lol hey that would work too 😉
So very cute! I definitely think you made the right choice by not painting the frame – the original color looks awesome with that fabric. Going to save this one – it actually looks like I project I could competently complete!
It took some time but overall it was really easy! I want to make some more to match my sisters room!
That looks fabulous! Great job!
Love this! Much prettier than a regular old cork board, and the colors are fabulous! Love the earthy tones. 🙂
Hey! That looks like *I* could even do that! Cute!
Awesome!
I think I might just give this a whirl!
Awesome! Love these sort of projects!